
There is only one more episode left in the main series (Alcalá de Henares), but before that, we’ll talk about this topic in an extra episode.
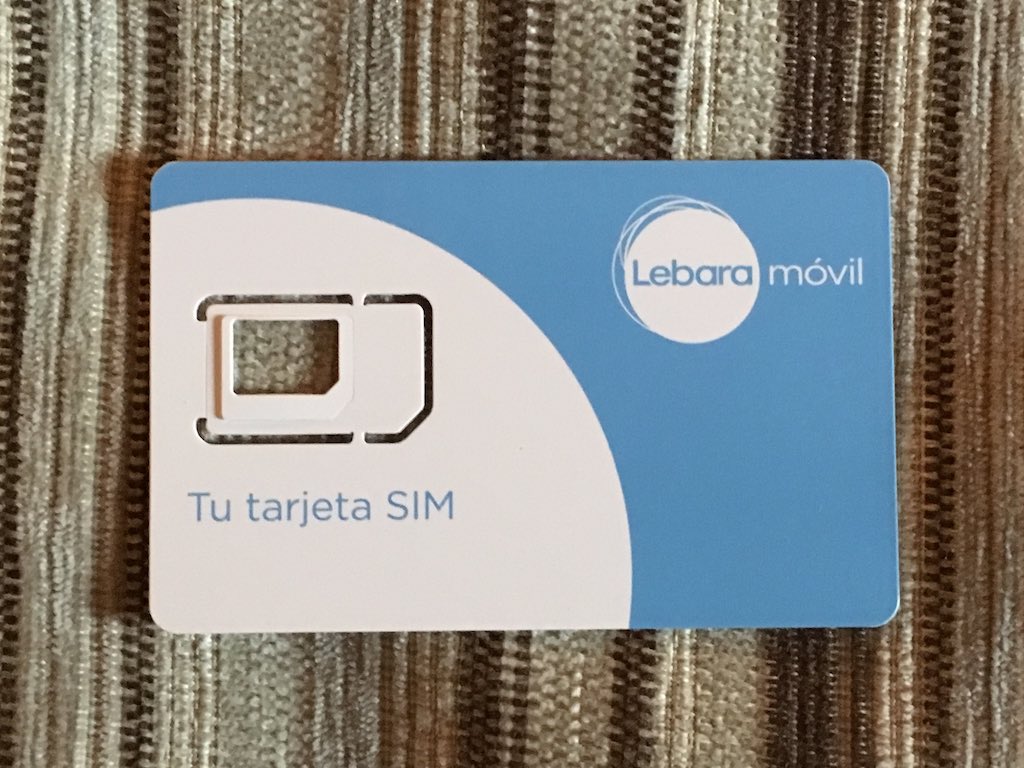
Spanish prepaid SIMs can be purchased right outside Barajas Airport.
I took the SIM free version of the iPhone SE, which was just released at the end of March, with me on this trip. I also took my old iPhone 6, which is also SIM free, as a backup device. In fact, I had submerged my iPhone in water in the past. From that experience, I always try to bring a spare device with me.
Well, the combination of a SIM free smartphone (iPhone) & prepaid SIM for international travel has now become commonplace. And information about how to get one easily when traveling abroad is now available all over the internet.
Now what about Spain? In conclusion, the iron continuation is very easy, comfortable to use, no problem at all! I can assure you that.
It’s right in front of the arrival gate.
It was located in the arrival hall of Barajas Airport Terminal 4 (via Qatar this time), right in front of the baggage claim.
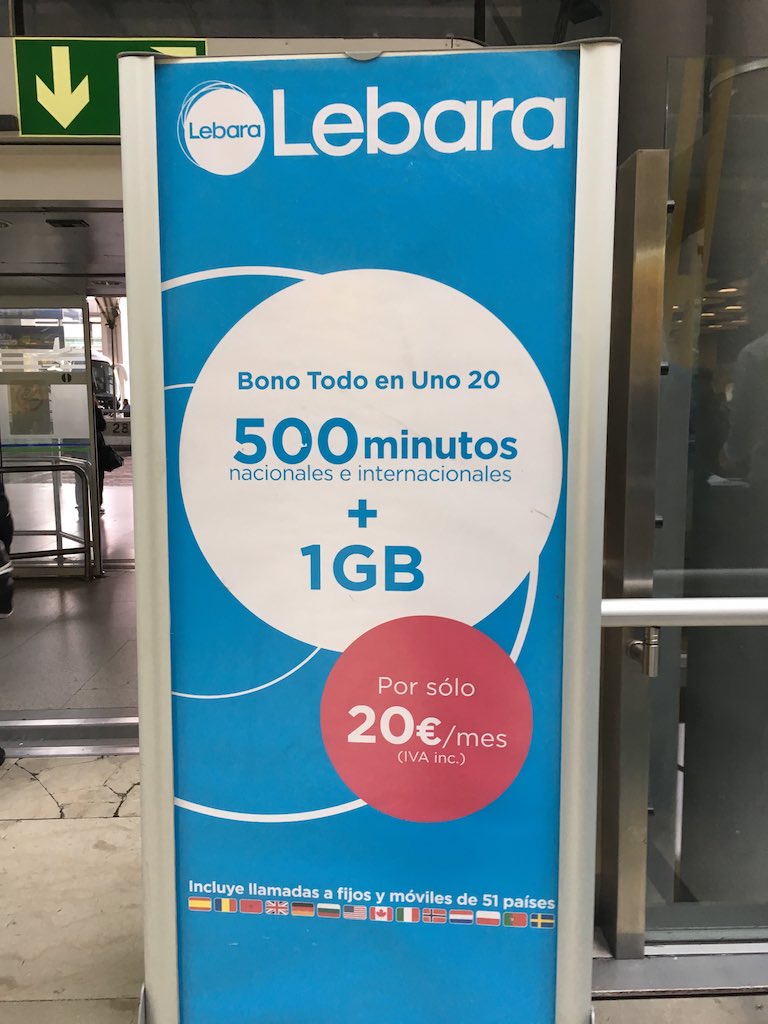
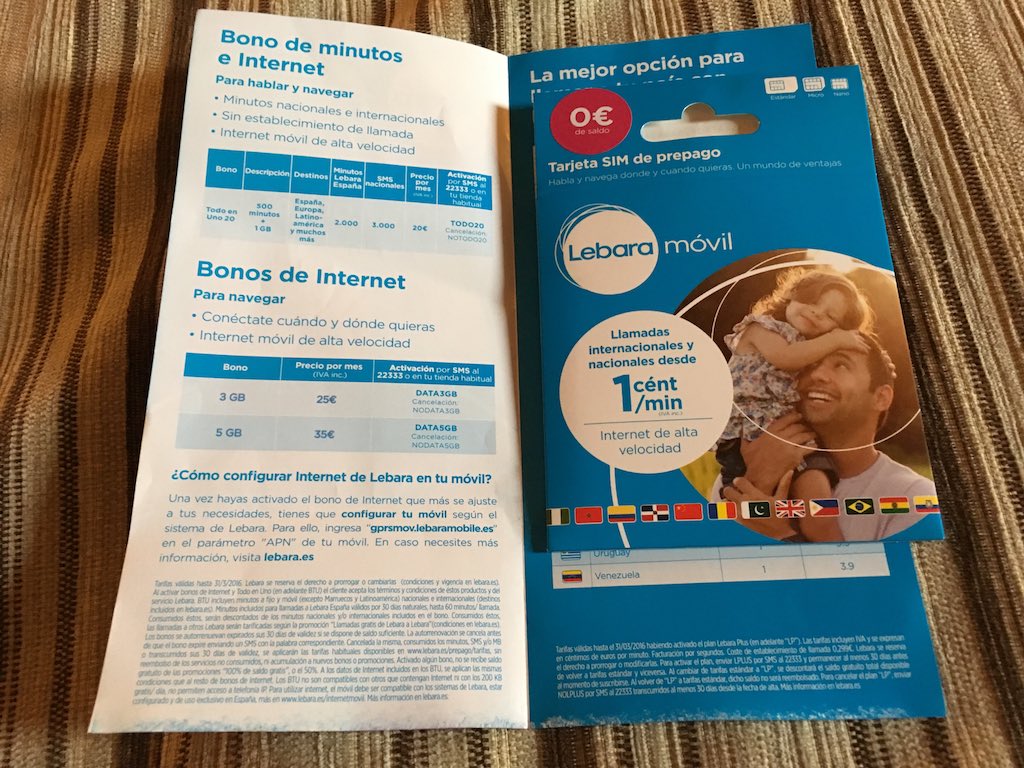
This SIM card has several plans for travelers, but if you are going to stay there for a while (about 2 weeks) and use a lot of data (browsing, social networking, Google Maps), I recommend either “25 euros for 3GB” or “35 euros for 5GB”. Both are valid for one month after activation. I think it was a no call plan. (Not sure)
I ended up going with 5GB. Honestly, I was fine with 3GB, but right after I bought it, I didn’t realize that there was a 3GB plan. To be honest, I think 2GB is enough for a 2-week stay, and 1GB might be a bit tough.
Set your phone’s language settings to Spanish or English beforehand!
By the way, I set my iPhone to Spanish settings right after I arrived in order to get it set up. When you buy a prepaid SIM locally, I think you should set it to the local language or English. That way, the process is smoother.
SIM purchase takes a little time at a somewhat remote station kiosk.
It’s not a big deal, but the place to buy a SIM card and the place to pay for it were quite far apart. The place to buy a SIM card is right outside the arrival terminal, but the place to pay for it is about 100m away from the terminal, at a shop (on the other side of a bar-like shop that sells sandwiches and drinks).
The person at the SIM counter pointed me to the shop over there to pay, but I was a bit confused at first because the distance was quite far. However, I showed the cashier there the various documents and receipts given to me at the SIM counter, and he processed the payment immediately. Of course, credit cards are OK.
Completion of all procedures takes about 30 minutes.
In the end, I talked to a person at the SIM counter, applied for a SIM, went to a shop about 100 meters away to pay, went back to the counter again, had various procedures done, and I think the time it took to finally be able to use the SIM was about 30 minutes. There may be some unfamiliarity, so I think it’s enough if you take such buffer into consideration and allow 1 hour in total. It is better to go through the procedure slowly and without panic.
In addition, this SIM shop was open even around 9pm, so I think you can buy it even if you have a late night flight. However, I didn’t know if it was open on Sundays. (I arrived on Saturday)
Be careful with profile settings (especially for iPhone)
Especially if you are using MVNO with SIM free iPhone in Japan, be careful. I bought this SIM in Spain, but I had to delete the domestic MVNO profile to be able to use this SIM. So you should delete the profile before using it. Reinstalling the profile is very easy, so take down the download URL beforehand and re-download and install it using the WiFi at Narita Airport when you return to Japan.
No problems at all with ease of use.
We traveled extensively this time, including Castile, Aragon, Catalonia and the countryside, and I don’t think we had any inconveniences such as long periods of no signal. I was able to use it very comfortably wherever I went. I was never bothered by the connection speed at all.
Using “mineo Overseas Prepaid SIM” released in Japan in France
In this trip, I had to go inside France for one day. Of course, I can’t use the SIM purchased here in Spain in France. If that’s the case, I’ll have trouble moving around in France (I’m using Google Maps navigation), so I decided to try mineo, which is a popular MVNO SIM, and as of May 2016, it’s an overseas version of a prepaid SIM.
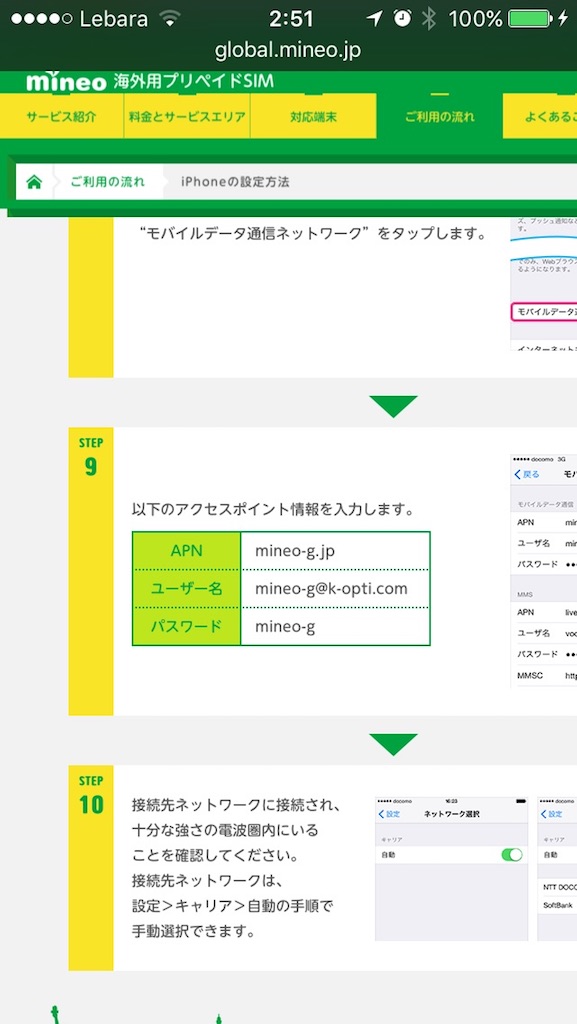
It’s a bit expensive, but you can recharge your phone in Japan before you leave (mineo allows you to select an area in Asia or Europe in advance, and you can pay with a credit card), so it’s much easier than buying a prepaid SIM and setting it up when you get there. It’s much easier than buying a prepaid SIM and setting it up.
In addition, the MVNO that I use in Japan is IIJmio, and this seems to have launched a prepaid SIM overseas version from this August. I think that there is also a feeling of a slight bargain in the rate setting by the fact that it is a late start.
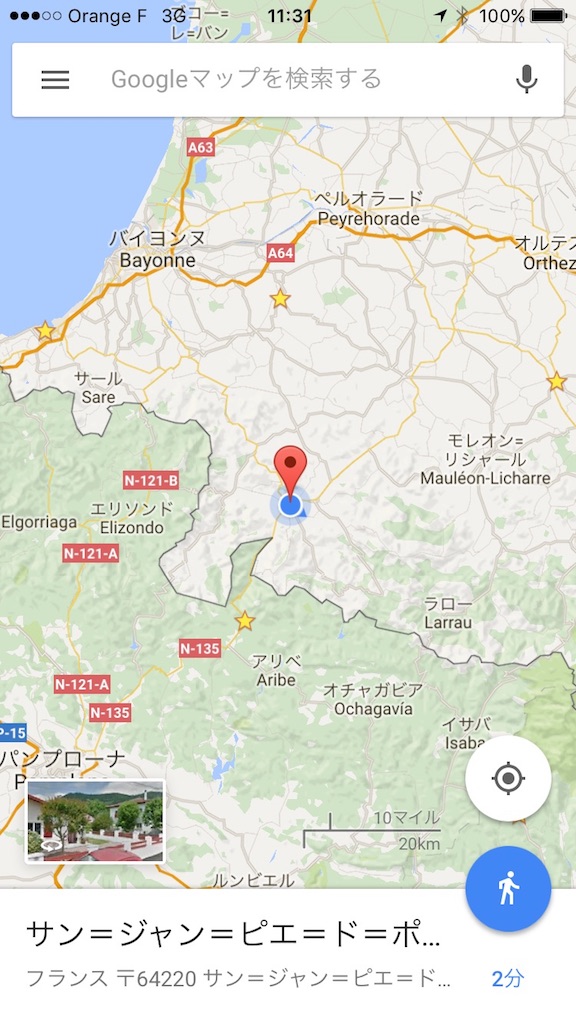
The most important thing is that it is very comfortable to use. I was able to use Google Maps for navigation and also social networking sites such as Instagram, Facebook and twitter.
So I thought it would be a good idea to have it as a backup.
I hope MVNOs will soon be able to offer overseas packet flat rates like the major carriers do.
If you recall, it was in 2010 that I started traveling with my iPhone, using SNS and Google navigation. At that time, overseas mobile WiFi rental had just started and Softbank’s unlimited overseas packet service was not yet available. (I think Softbank started this service in July of that year. Compared to those days, it has become really convenient. Nowadays, a smartphone is a necessity when you travel abroad, isn’t it?
ということで、プリペイドSIMに関する番外編をお伝えしました。次回はこの「2016年GW スペインの旅」は最終回です。(続く)