I counted properly the “Most Beautiful Villages of Italy”.
なんとその数230箇所!
Creating a beautiful village list in a spreadsheet
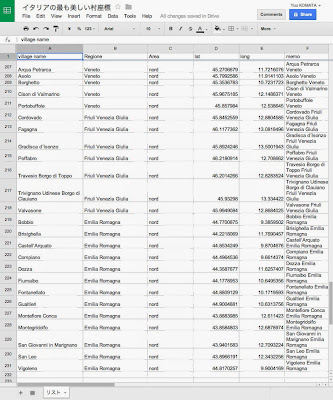
First create a beautiful village list using a spreadsheet like the one above (in this case Google Spreadsheet).
The way to create is simple. Copy and paste the village list page from the official site like this, and then click
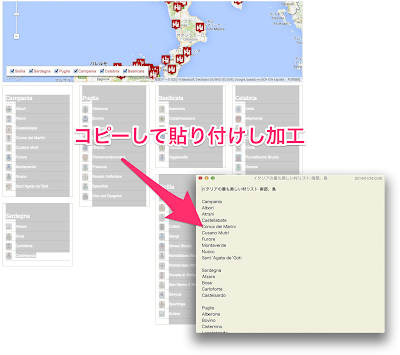
All you have to do is process it a bit and paste it into a spreadsheet.
Registering with Google Maps Engine
I’d like to register all of these in Google Map’s My Maps.
と思ったのですが、実は去年くらいからマイマップ機能は「Google Maps Engine」というものに進化していました。
But before we can do that, we need the location of each village.
Acquisition of location information by using Google App Script
To get the location information of all the villages, we use Google App Script, which we have done before.
MySQL+PHP+Google Map API, Google Script で「フランスの最も美しい村」マップを作成 | my lifelog yuu-koma.jp http://www.yuu-koma.jp/?p=8623
Search in Italian (IT) by setting “Target area to Italy (IT)” and search by village name + province name. Same as France.
Google App Script is written as follows.
[php]function getLatLngItaly() {var mySS = SpreadsheetApp.getActiveSpreadsheet();var mySheet = mySS.getActiveSheet();var i = 2;while (mySheet.getRange(i,1).getValue() != “”){var targetBVname = mySheet.getRange(i,1).getValue() + ‘, ‘ + mySheet.getRange(i,2).getValue();var geocode = Maps.newGeocoder().setRegion(“IT”).setLanguage(“it”).geocode(targetBVname);var geo = geocode.results[0];var geodata = geo.geometry;mySheet.getRange(i,4).setValue(geodata.location.lat);mySheet.getRange(i,5).setValue(geodata.location.lng);i++;}}[/php]
The latitude and longitude calculation is now complete.
Register to Google Maps Engine 1: Prepare 3 layers
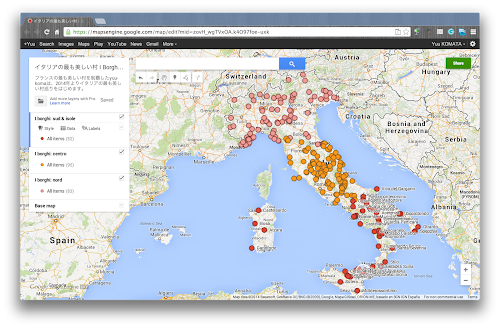
Now you can open Google Maps Engine, create a new map, and “add a layer” to it to reflect the village information you just acquired on the map.
There are two versions of Google Maps Engine, Lite and Pro. Lite version allows you to add 3 layers to one map and 100 lists per layer.
ということで、イタリアの最も美しい村を、公式ウェブサイトでも分類されているように「北部(nord)」「中部(centro)」「南部と島(sud&isole)」の3つのレイヤーにわけて登録することにしました。
I could have used Google Spreadsheet, but for some reason I ended up with three Excel files to register to each layer.
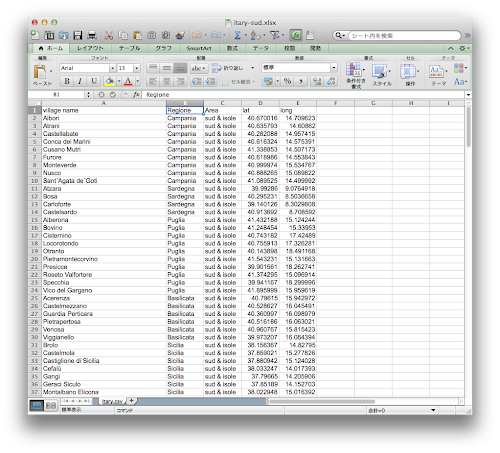
Make sure to put the column name in the first column as shown above.
Register to Google Maps Engine 2: Layer file upload
You have to upload layer files for each layer, but the operation is simple.
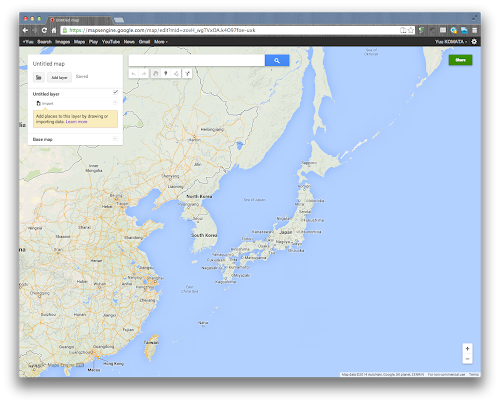
Click “import” in the upper left corner “Untitled layer”.
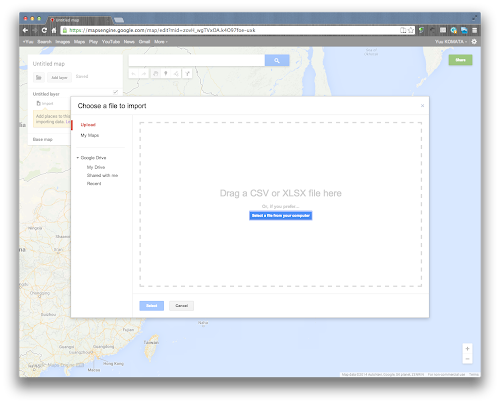
The following screen will appear, and you can simply drag and drop the layer file you created above.
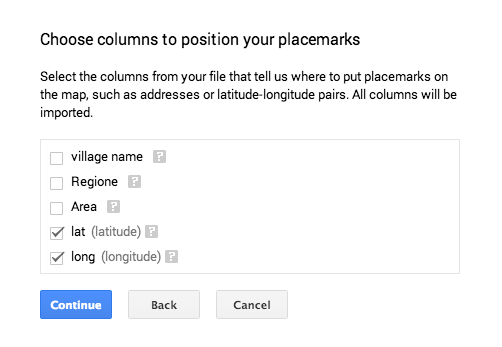
All you have to do is follow the instructions. As for the location information, it seems to be recognized automatically because it uses the column name of latitude and longitude (lag, long).
As you can see, the marker name is also available by simply selecting the column name in the file.
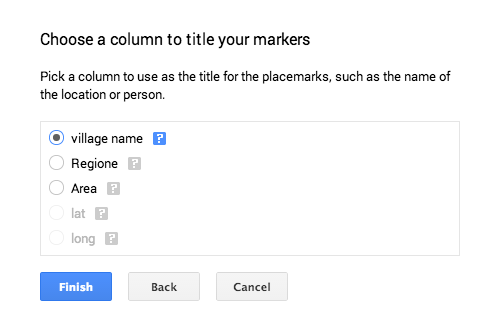
The registration is now complete.
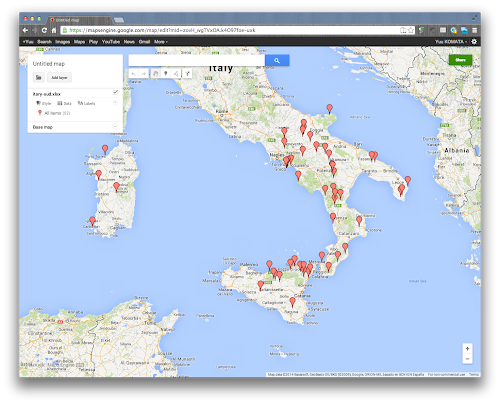
Register with Google Maps Engine 3: Create 3 layers and complete
I added the central and northern layers in the same way, and changed the shape and color of the marker.

As you can see, you can also see the contents of the registered data. The corresponding location balloon is also displayed.
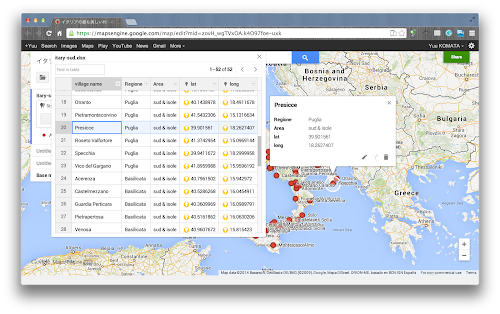
Yes, very convenient. The visual is also beautiful.
By the way, how do I view the map I registered here on my iPhone, and how do I view it in the Google Maps app on iOS?
This is very important because I want to use Google Maps navigation when I drive around beautiful villages.
In fact, this one is a bit tedious, but it was possible. I’ll explain this in the next article. (To be continued)
